Saturday, 14 January 2017

Teaching Others to Sew - Simple Carry Bag Tutorial

We have a local Facebook page, on which someone had asked about sewing lessons. As soon as I offered to teach, I was swamped with responses. I will be taking my first class next week, and in preparation, I have written a tutorial for making a simple carry bag, perhaps to use for shopping.

Please feel free to comment on this tutorial. I have tried to keep it as simple as possible for beginners and would appreciate any feedback.

Carry Bag
Materials
Cotton or poly-cotton fabric – approximately 80cm of 110-115cm wide fabric
Thread
Cutting
For the bag body, cut 2 squares, 40x40cm
For the straps, cut 2 rectangles, 75x15cm
Sewing instructions
Straps – make 2 the same way
1.      With wrong sides together, fold the strip in half lengthwise, pressing with an iron to crease.  

2.      Unfold the strip, re-fold with right sides together.
3.      Pin 1.5cm seam along raw edges. 

4.      Sew in the direction of the pinning, removing pins as you go. (Leave needle in fabric each time you stop sewing to remove a pin.)
5.      Using a safety pin, turn strap through to outside.
6.      Roll seam between fingers to get edges neat, press.
Body of bag
1.      Match the 2 pieces of the bag, right sides together.
2.      Pin along right-hand side, along base, then along left-hand side.
3.      Start just below the top right-hand corner. Set machine in reverse.
4.      Sew in reverse for a few stitches.
5.      Reset machine to normal.
6.      Sew in the direction of the pinning, removing pins as you go. (Leave needle in fabric each time you stop sewing to remove a pin.)
7.      At corners, stop sewing with the needle in the fabric, turn wheel towards you so that the needle is on its way upwards but still in the fabric, then lift the foot. Turn bag anticlockwise until it sits correctly for the next direction of sewing.
8.      At the end of the sewing, at the top left-hand corner, set machine in reverse and sew a few stitches.
Make boxed corners
1.      Measure and rule a square 4x4cm at each bottom corner of the bag.
2.      Cut out both squares. 


3.      Press open seams. Neaten each part of seams with zigzag or overlock stitch.
4.      Once your seams are pressed open and neatened, place your hand inside the bag and bring the corners together lining up the seams.


5.      Pin and sew a 1.5cm seam across the diagonal cut.


6.      Neaten the seam with zigzag or overlock stitch through all thicknesses.
7.      Turn through to outside and admire your neatly aligned boxed corner.
Attach straps to bag
1.      On the open top of the bag, measure and mark 4cm from sewn side of bag.
2.      Make another mark 1cm below this mark.
3.      Press under 1cm all around top edge of bag.


4.      Place edge of raw end of strap against the 1cm mark, right sides together.


5.      Pin in place 1cm from top edge of strap. Make sure to keep the other side of the bag clear while pinning and stitching.
6.      Stitch across strap end.
Finishing
This is the trickiest part for varying thicknesses and fiddly pieces that try to get caught up in the stitching, so take care and work slowly and systematically. When putting this section through the machine, make sure only one part at a time is passing over the feed plate (under the needle). If your machine has a small arm, the bag can go over this arm and feed around it.
1.      Turn bag inside out, with straps inside.
2.      Press under approximately 1cm again on top of bag, so that the edge is turned under double. Include sewn tops of straps, keeping them straight. Pin straps temporarily to the body of the bag further down if necessary.
3.      Pin all around this fold, taking care to keep strap tops straight in the fold, and keeping the rest of the strap clear. Pin perpendicular to the top with pins pointing downwards, if pins will not sit right.
(At this point, the bag should look nearly finished (but inside out), the straps should be mostly out of sight while working on the edge, and all raw edges of the open top of the bag should be neatly tucked into the fold and pinned.)
4.      Stitch carefully all around the fold. This should be done slowly and carefully, taking care to catch in only the parts that should be, and moving across varying thicknesses as you sew in the straps. (Hint: Use a folded piece of fabric at the back of the foot to boost the machine foot when going over the thicker sections.)
5.      Finish off threads by pulling bobbin thread through to the inside of the bag and tying off the threads before snipping them.
6.      Pull bag through to right side. Bring straps to outside and pin in place where they meet against the folded top of bag.
7.      Topstitch all around top of bag, catching in straps as pinned. (Use hint again from instruction 4 above.)
8.      Pull threads through to inside of bag. Finish as per instruction 5 above.

9.      Say hooray!

Saturday, 6 August 2016

A Philosophy of Scarves and Memories of Mum

Scarves are more than an article of clothing.

My mother grew up in the Great Depression. She knew how to save a penny and how to make the most of anything she had. She was also rather pretty and a little vain, and put great stock into showing a good appearance to the world. With such a combination of traits, and raising nine children (just to keep the pennies even tighter), Mum had sound advice about how to dress well and feel good about one's appearance.

I recall Mum saying once that as long as you had a nice, serviceable coat and basic outfits, you could change your look each year with a change of shoes, handbag, or other accessories. I suppose hats featured in there for many years, too.

Mum was a careful shopper with clothes all her life. She never had many, but everything was good quality, built to last and stylish without having to be the height of fashion. No fads were ever entertained and she always looked good.

In her later years, she accumulated scarves. As she aged and had to wear more sensible shoes, dresses and skirts gave way to basic pants with simple tops and jumpers, usually in plain colours. This allowed for the embellishment of scarves.

Scarves enabled family members to choose gifts for Mum, who had simple tastes and lived humbly. A scarf could be an expression of mood, a little bit of flair, an eye-catching piece on a simple outfit.

I didn't start making scarves until recently, so I never made one for Mum, but I did inherit her love of beautiful things, especially fabrics, and have put this into my sewing. My beautiful sewing machine was Mum's, bought in 1948 with money she was given as a farewell/wedding present from workmates. It was the machine on which I learnt to sew and now takes pride of place in my house, sitting on a table made from a renovated treadle table from an even earlier era.

As I make the scarves, I think about how a little piece of fabric can offer so much. It can be a gift. It can be a little splashing out of spending on oneself. It can be a bit of self-expression without being too loud or obvious. It can be a bit of brightness and cheer.

Many of us are self-conscious, particularly as we age in a culture that worships youth and an unattainable notion of beauty. I know many women who are unhappy with their appearance and/or unsure of what suits them, or even of what they like. We are fragile creatures.

What I try to do with my scarves is to offer a little escape from self-consciousness, a little spring in your step, a little bit of prettiness to frame your face in the mirror, a little reward for being yourself. (You are also unlikely to meet yourself at the next corner, as my scarves are limited editions, mostly one-offs.)

A scarf can be the difference in our day.


Baby Sleep Mat

Baby Sleep Mat


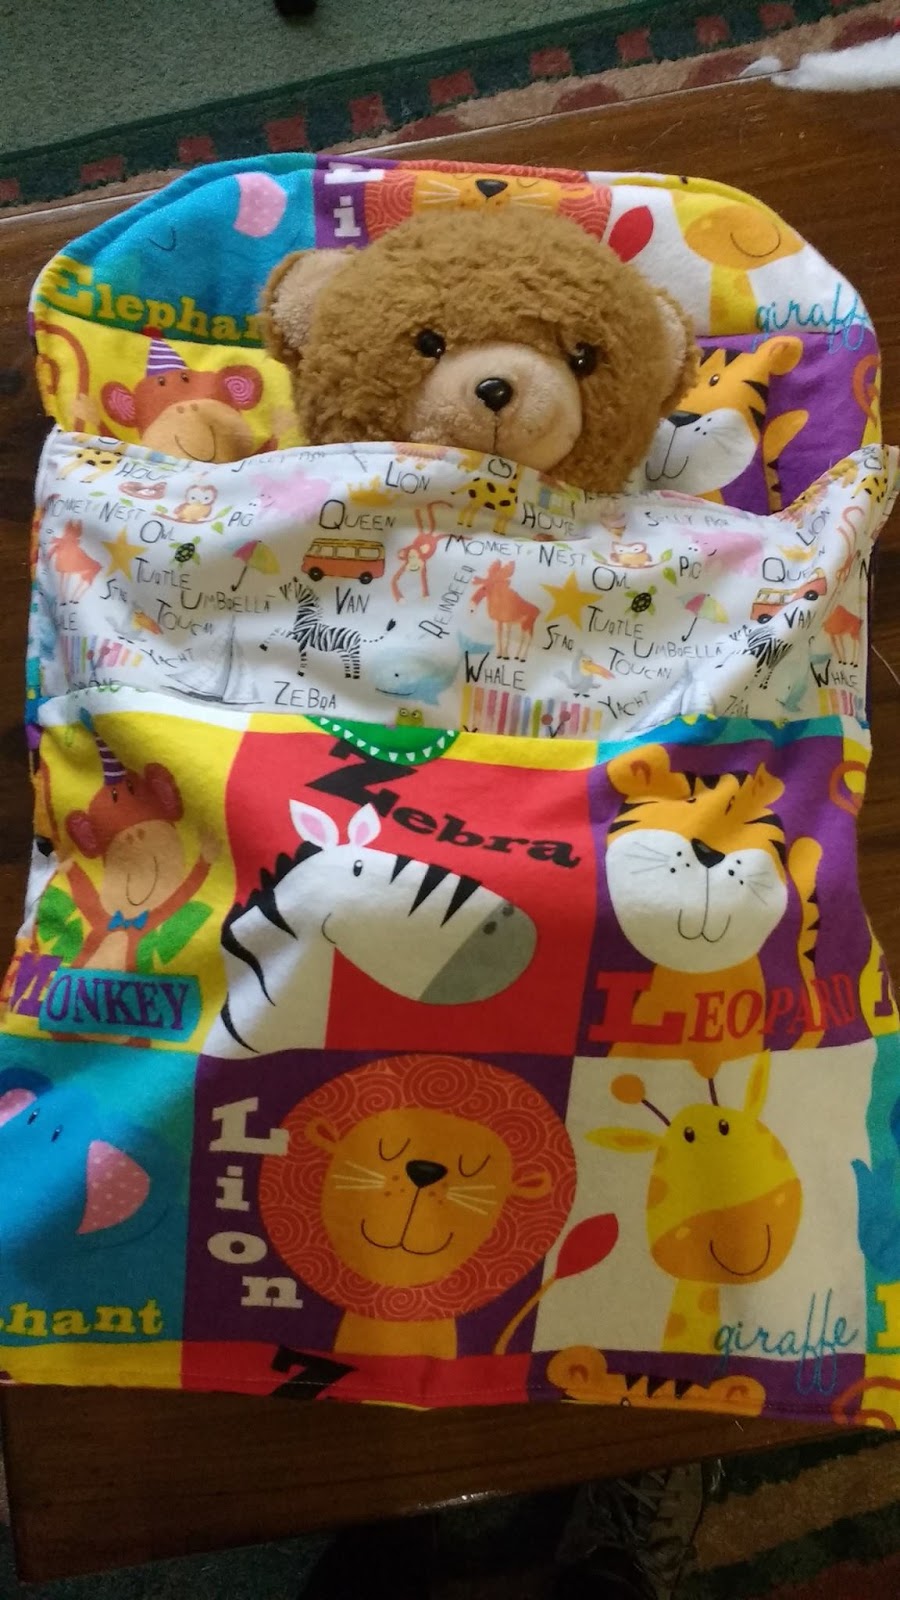
I was looking for a baby sleep mat pattern and couldn't find what I wanted. There was one that used a pillow and made it as a pillowcase. While that seemed neat and practical, I was concerned as we were always told not to put babies on pillows for fear of suffocation, so I thought I would create my own.

This is not going to be the most comprehensive tutorial, but hopefully it will be helpful for someone.

I chose flannelette for its softness and fleecy for added soft padding.

I bought 3 remnants, two of flannelette and a small one of cotton, plus some wadding, 30mm thick. I was guided by the size of the pieces and my research, which indicated that a pillowcase would be about the right size. I made mine a bit bigger than a pillowcase.

In my overwhelmingly huge stash, I had a piece of red and a big amount of white fleecy.

Cutting the flannelette into the right widths gave 4 similar-sized pieces.

If buying fabrics specifically for this, I would guess that the back would need about 0.8 metre, the underlay (the inside bit where the baby will lie) would need about the same, and the overlay/front would need about 0.6m. The little cotton piece I added to the front was about 15-20cm of fabric. I used a piece of white fleecy 15-20cm in length and half the width of the cotton piece to line it. The underlay was in red fleecy and I had enough of the flannelette to sew that on top of half of the underlay so that the red did not show when the bag is closed.

The cotton piece at the top of the overlay is optional. I used it because I did not have enough flannelette and because it was just so cute. I was thrilled to be able to get two different zoo animal prints to use together.

I used a 40cm (16") zip from my collection.

I lined the cotton piece with white fleecy for softness and warmth. I cut the fleecy to the size of the folded piece of cotton.

I stitched the fleecy to the cotton near the edge.

Folding the cotton piece in half, I cut the flannelette piece to the same width, allowing for seam allowance, and squared up the edge of the remnant.
I sewed the cotton piece, folded as in the picture, to the flannelette piece and pressed the seam down. I overlocked the raw edges.
I overlocked the seam between the cotton and flannelette on the overlay piece.

I sewed two of the flannelette pieces together to make the length of the back piece and pressed the seams open (eventually). If I had a single piece long enough, I would not have needed to sew these two to make the back.

Working with the flannelette pieces for the back, I cut a piece of red fleecy to about the same size for the underlay.
The last piece of flannelette was sewn to the fleecy about halfway down, and turned back and pressed. This step could be skipped if you wanted the fleecy  to show.


This made the underlay: the part where the baby will actually lie.
The zip presented a challenge. It took me a while, but I figured that I had to sew one side of the zip to the back and underlay. I placed the left-hand side of the zip, face down, against the edge of the back (right side), then placed the underlay face down on top of that, with edges meeting, and sewed the zip using a zipper foot.
Sandwiching the back, zip and underlay

When the zip was sewn in, I turned back the underlay to reveal the unsewn side of the zip.

 Lining up the right-hand side of the zip, face up, with the edge of the front, I sewed in the zip.
Overlay at top of picture, zip sewn in, back at bottom of picture.
I sewed up the rest of the seam between the back and the underlay, and top-stitched, but then I remembered I wanted a curved top. Oops. I unpicked some stitching, cut and resewed a curve, breaking a needle in the process. Serves me right for not planning properly.

With the back face up and the underlay and overlay face down, I sewed together all the pieces from the base of the bag, up the side, across the top (with new curves) and down the other side, leaving the base open. Once I was sure I knew what I was doing, I trimmed the seams and turned through the whole bag. I top-stitched all around the outside.

I stay-stitched the red fleecy to the overlay before inserting the wadding, and pressed up both open sides of the base.


Using the nearly made bag as a guide, I cut the wadding to the same shape, taking care to cut the bottom a little shorter in length to be able to sew the base shut.


Once the wadding was inserted, I stitched across a line in the pattern to ensure the insert did not slide around.
I stitched the base of the bag shut, but had to hand-sew near the base of the zip. One broken machine needle was enough for one day.

And here it is!!

Tuesday, 19 July 2016

Selection of Items Made - Gallery

A Few Things I Have Made

Some people have not seen my Facebook page, Kwee, https://www.facebook.com/kweecreations/
This selection of photos is to give an idea of what I can make and sell, and give an idea of my general costs. Most of my creations are one-off or at least very limited edition, so prices vary, but I try to keep things affordable and reasonably consistent.

Please feel free to contact me on this blog or the Facebook page, or email: kweecreations@gmail.com. 

Thank you for viewing my creations.
Catherine

Cat bag, sold

Cat top, given as gift

Bird bag, given as gift

Bird bag, given as gift

I made this evening bag to use for my son's wedding, but then had to change the shoes (sprained ankle!) so I made a different evening bag for the wedding. This black bag is made from a remnant of an unusual piece I bought in an op shop and used for a shift dress.

My first attempt at patchwork. It's my multipurpose carry bag.

Mauve evening bag, sold. I have more of this fabric. An evening purse like this would be $25-30, depending on the fabric and/or embellishments.

Purple evening bag in progress.
Ipad bag, given as gift

Purple evening bag I used for my son's wedding

Patchwork not yet made into a carry bag - open to offers!

My own shoulder bag, before a pen leaked and left a huge stain.

My re-vamped shoulder bag, after the stain. The new double pocket is so useful, I'm actually grateful the pen leaked!

Reversible bag donated to a fundraiser

Reversible bag in pretty blues, $25


One of my favourites, given as a gift

Tulle added to child's skirt, sold

Child's skirt in vintage fabric, sold

Lightweight travel bag with zip closure, given as gift

Reversible bag, sold

Orange patchwork carry bag, $35, sold

Orange patchwork carry bag, $35, sold

A couple of favourites, left one given, right one sold

Short infinity scarves (this style $15)

Short infinity scarf (this style $15)

Short infinity scarf (this style $15)

Mid-length infinity scarf (this style $15)

Short infinity scarf (this style $15)

Short infinity scarf (this style $15)

Short infinity scarf (this style $15)

Short infinity scarf (this style $15)

Short infinity scarf (this style $15)

Short infinity scarves (this style $15)

Black and white, short infinity scarf, $15
Floral mid-length, $15

Short infinity scarf, sold (this style $15)

Long infinity scarf worn doubled, sold

Long infinity scarf, sold (this style $20)
Baby sleep mat, made as a gift.
A similar item would be $30-40, depending on the fabric and design specifications.


Given as gift. A similar one would cost $45.

$15